How to create a bootable installer for macOS (Update 2024)
1. Download macOS installer
- To get a full macOS installer, download macOS from the App Store or your web browser using the links provided here: How to download and install macOS.
- Download from a Mac that is compatible with the macOS you're downloading. If you’re downloading an older macOS, you may need to use an older Mac that is compatible with it.
- Download from a Mac that is using the latest version of OS X El Capitan, or any later version of macOS. Find out which macOS your Mac is using.
- Enterprise administrators: Download from Apple, not a locally hosted update server.
- After you have the installer:
- Make sure the installer is in the Applications folder of your startup disk. This is the folder that opens when you choose Go > Applications from the menu bar in the Finder.
- Make sure the installer is named Install [Version Name], such as Install macOS Sequoia. It must be an installer app, not a disk image (.dmg) or package (.pkg) that contains the installer.
- Connect the USB (recommend least 16GB storage USB)
- Open Terminal
- Type or paste one of the following commands in Terminal. Notice: USB is name of your volume (device USB)
- *If your Mac is using macOS Sierra or earlier, include the --applicationpath argument, similar to the way this argument is used in the command for El Capitan.
Sequoia
sudo /Applications/Install\ macOS\ Sequoia.app/Contents/Resources/createinstallmedia --volume /Volumes/MyVolume
Sonoma
sudo /Applications/Install\ macOS\ Sonoma.app/Contents/Resources/createinstallmedia --volume /Volumes/MyVolume
Ventura
sudo /Applications/Install\ macOS\ Ventura.app/Contents/Resources/createinstallmedia --volume /Volumes/MyVolume
Monterey
sudo /Applications/Install\ macOS\ Monterey.app/Contents/Resources/createinstallmedia --volume /Volumes/MyVolume
Big Sur
sudo /Applications/Install\ macOS\ Big\ Sur.app/Contents/Resources/createinstallmedia --volume /Volumes/MyVolume
Catalina
sudo /Applications/Install\ macOS\ Catalina.app/Contents/Resources/createinstallmedia --volume /Volumes/USB
Mojave
sudo /Applications/Install\ macOS\ Mojave.app/Contents/Resources/createinstallmedia --volume /Volumes/USB
High Sierra
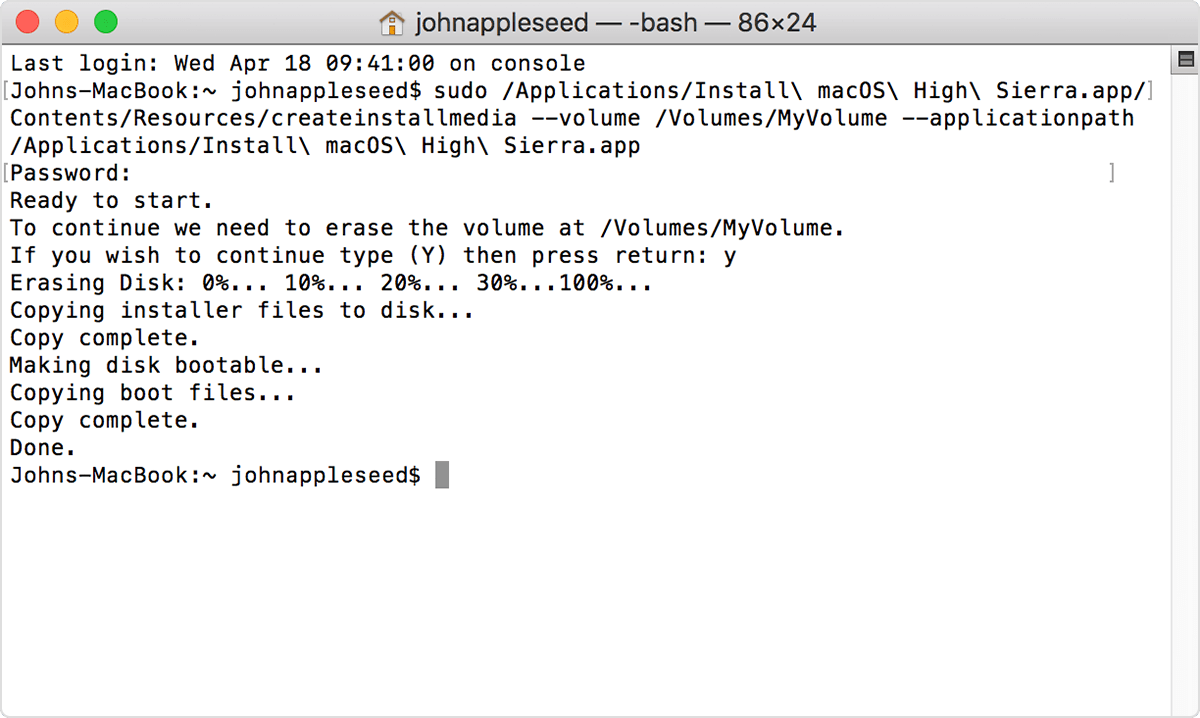
sudo /Applications/Install\ macOS\ High\ Sierra.app/Contents/Resources/createinstallmedia --volume /Volumes/USB
El Capitan
sudo /Applications/Install\ OS\ X\ El\ Capitan.app/Contents/Resources/createinstallmedia --volume /Volumes/USB --applicationpath /Applications/Install\ OS\ X\ El\ Capitan.app
Yosemite
sudo /Applications/Install\ OS\ X\ Yosemite.app/Contents/Resources/createinstallmedia --volume /Volumes/USB --applicationpath /Applications/Install\ OS\ X\ Yosemite.app
Mavericks
sudo /Applications/Install\ OS\ X\ Mavericks.app/Contents/Resources/createinstallmedia --volume /Volumes/USB --applicationpath /Applications/Install\ OS\ X\ Mavericks.app

3. Press Return after typing the command.
4. When prompted, type your administrator password and press Return again. Terminal doesn't show any characters as you type your password.
5. When prompted, type Y to confirm that you want to erase the volume, then press Return. Terminal shows the progress as the bootable installer is created.
6. When Terminal says that it's done, the volume will have the same name as the installer you downloaded, such as Install macOS Catalina. You can now quit Terminal and eject the volume.
Source: collect & edit
Source: collect & edit
Comments
Post a Comment